Wednesday, April 29, 2020

Hello Foodies, 
          A Quesadilla is a most loved one of the Mexican dishes, and it is made with tortilla(whole wheat/corn/apf flour flatbread) and filled with cheese, veggies, beans, and spice mix. To make this Mexican dish, you need the ingredients which can be easily found in your kitchen pantry. When I’m feeling too lazy to make a proper meal, I throw together a quesadilla in less than 30 minutes. 

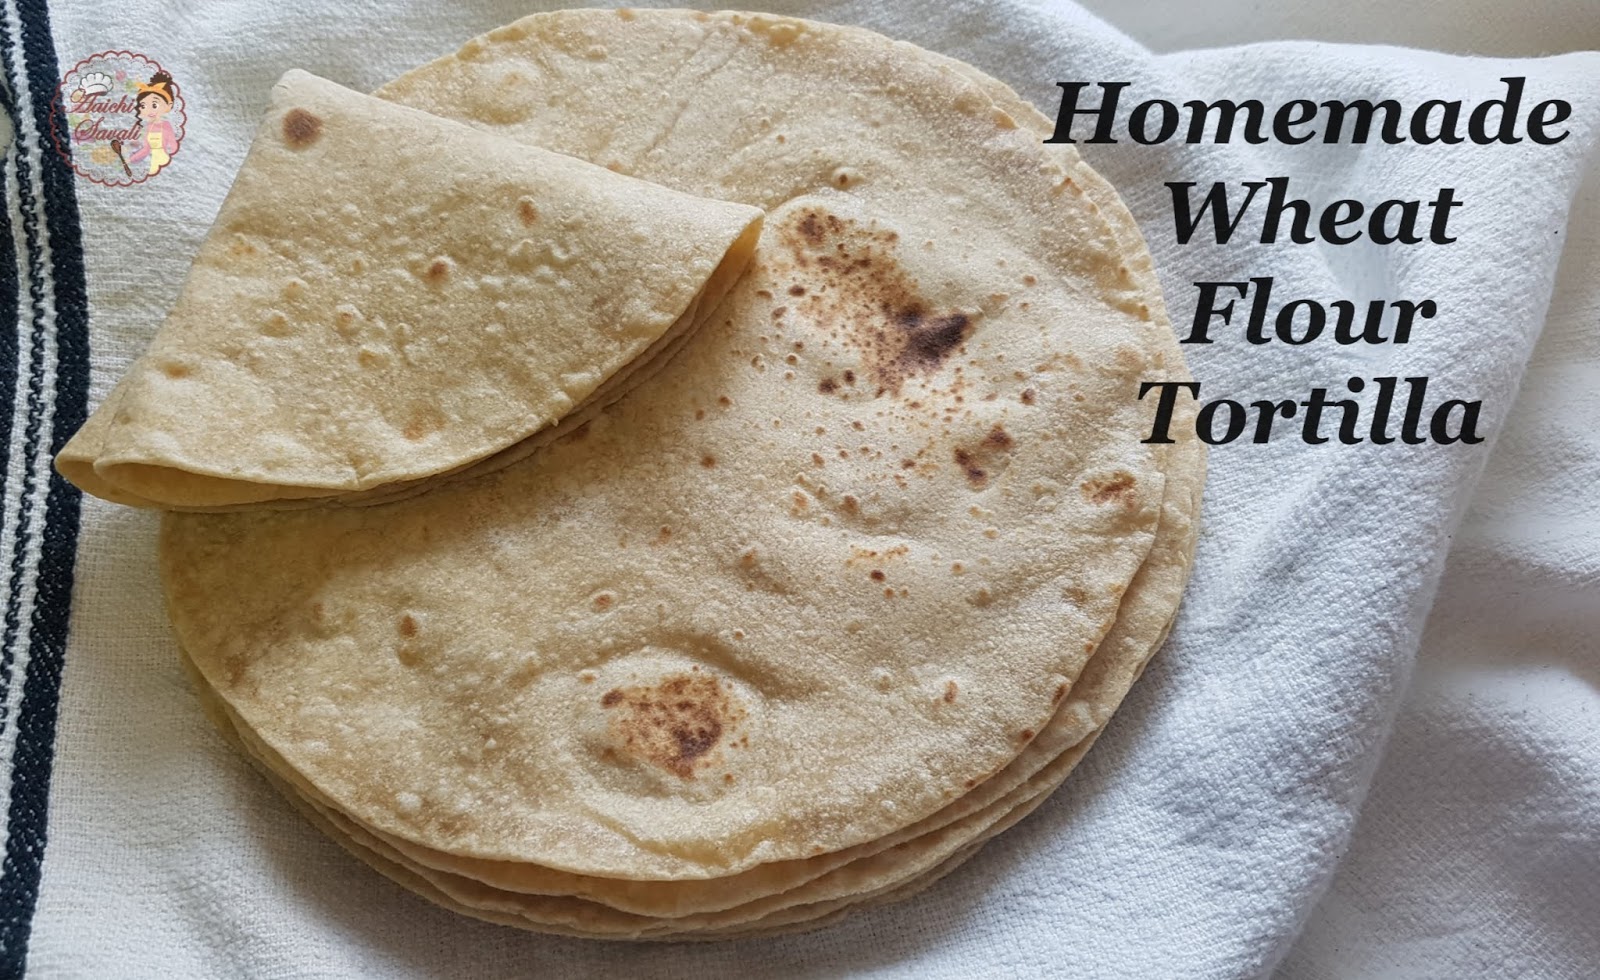
          These quesadillas are packed with bell peppers, mushrooms, beans for protein, and sweetcorn. I used my soft and 100% whole wheat tortillas for some nutritional bonus points and topped with a generous amount of cheese to make it more delicious. 

Video Recipe:

Here are some of our other favorites recipes to try:
Preparation Time: 15 Minutes; Cooking Time: 15 Minutes.
Each Serving of Veg. Quesadillas Contains 326 Calories.


Ingredients:
  • Whole Wheat Tortillas 4
  • Black Beans 1 Cup(I have used canned beans, but you can use home-cooked beans)
  • Red Bell Pepper ½ Cup
  • Green Bell Pepper ½ Cup
  • Mushrooms 1 Cup 
  • Corn 1  Cup(fresh and boiled)
  • Cumin Powder 1 Tsp 
  • Salt 1 Tsp 
  • Black pepper ½ Tsp
  • Quesadilla Seasoning 1 Tbsp(You can use taco or burrito seasoning too) 
  • Coriander leaves 2 Tbsp, chopped
  • Lemon Juice 2 Tbsp
  • Mozzarella Cheese 2 Cups
  • EV Olive Oil 2 Tsp

Instructions:
To Prepare the Stuffing for Quesadilla:
  • Heat oil in a pan over medium-high flame. 
  • Add red and green bell peppers, black beans, mushrooms, corn, and saute and cook for 4-5 minutes or until the bell peppers become softened.
  • Now, add cumin powder, black pepper, salt, and quesadilla seasoning and mix well.
  • Turn off the flame and stir in the coriander leaves and lemon juice and keep it aside.

To Prepare the Quesadilla:
  • Heat the skillet or pan on a medium flame and add place the whole wheat tortillas.
  • Top the tortilla with cheese, cooked veggies mixture, and another layer of cheese. 
  • Place another tortilla on top and cook, flipping once, lightly press on the Quesadilla using a spatula, and cook until both sides start to brown and become crisp(Be very careful when flipping the Quesadilla). 
  • Similarly, prepare the remaining Quesadillas.
  • Take the Quesadilla out and using a pizza cutter, cut into half and then quarters. 
  • Quesadilla is ready to serve, serve with salsa and guacamole. Enjoy!!!

If you find the above method challenging to cook the Quesadilla, then try this easy way to flip and cook Quesadilla:
  • Place a tortilla on the hot skillet and spread the cheese and filling on half of the tortilla, and the second layer of cheese and fold the other half of the tortilla over the filling and cheese making a semicircle.
  • Using a spatula, lightly press on the Quesadilla and cook until both sides start to brown and become crisp.
  • Take the Quesadilla out and using a pizza cutter, cut into half or three triangular pieces.
  • Quesadilla is ready to serve, serve with salsa and guacamole. Enjoy!!!

My Take:
  • You can use your favorite cheese. You have many options like you can use cheddar, Monterey jack, a Mexican blend, pepper jack, or your favorite melting cheese. 
  • Also, you can add cooked chicken, shrimps, avocado, tomatoes, etc.

Dietary Comment:
  • The calorie count is based on a 2000 calorie diet.
  • Per serving contains 326 calories, along with 42 g carbohydrates, 7.2 g dietary fiber, 14.1 g fats, and 15.5 g protein.
  • Portion size can always be increased or decreased depending on your health goals and activity level.
  • If you make this recipe, share your food picture with hashtag #aaichisavali on Instagram and Facebook so that everyone can enjoy it too! 
  • Subscribe to my YouTube channel for Healthy, Tasty, Instant Pot, and Air fryer recipes.
  • I love it when you try my recipes and send me pictures & feedback.

Eat Healthy, Stay Healthy!!!

Sunday, April 26, 2020

How to Make Soft Whole Wheat Flour Tortillas From Scratch

Hello Foodies,
         I love flatbreads, and our one meal of the day contains flatbread and any Indian curry. Chapati, Bhakri, Paratha, Pita, Naan, Phulkas, and Tortillas, literally anything in the flatbread category, Dr.K and me just love it. Homemade flatbread makes any meal seem special. 


Preferably for a softer texture, I recommend using whole wheat flour instead of all-purpose flour. To make tortilla at home, all you’ll need is flour, salt, baking powder, oil, and water. It always amazes me that such simple ingredients can yield such yummy results! I served them with homemade zesty beans. The tortilla is very similar to Indian Flatbreads - Roti/Chapati/Phulka. Whole Wheat Tortillas are a variation of corn tortilla and plain flour tortilla, which used in Mexican Cuisine.

Video Recipe:

        We like quesadillas as an easy weeknight dinner, and I was out of tortillas, so I made these whole-wheat tortillas from scratch. Making homemade tortillas may sound intimidating, but if you take it one step at a time, I am sure it’s doable! Give it a try.


Tips to Make Tortilla:
  • Do not stack rolled tortillas while waiting to cook them, or they may become soggy and will stick to each other.
  • If you like, you may substitute the oil with the ghee or butter or vegetable shortening.
  • The dough should be Soft and Pliable.
  • You can use Tortilla maker to roll the tortilla.

How to Make Flour Tortillas
  • Combine the ingredients, and adding water knead the dough until smooth.
  • Divide into equal pieces and roll into balls.
  • Roll dough balls into circles.
  • Cook on the first side until bubbles start forming, flip, and cook on the second side.

The perfect consistency of the Dough: 
         The dough should be soft and pliable. If it is overly sticky, you can mix in 1 tbsp flour at a time to reach a workable, yet stretchy dough. On the other hand, if it seems dry, you can mix in 1-2 Tbsp of water.

Why rest Tortilla dough?
            It allows time for the gluten in the dough to relax and makes the dough easier to work with. 

Healthy Indian Flatbread Recipes to Try:
Ingredients:
  • Whole Wheat Flour 1 ½ Cups
  • Baking powder ½ Tbsp 
  • Salt ½ Tsp 
  • Oil 1 Tbsp 
  • Water as needed to knead the dough 

Instructions:
  • In a mixing bowl, add whole wheat flour, salt, baking powder, and oil, and mix well.
  • Add water and mix and knead to make a soft dough.
  • Cover the dough and keep it aside for 15 minutes.
  • After 15 minutes, divide the dough into nine equal balls.
  • Take one dough ball and dust it with flour and roll each part to make an 8 to 9-inch circle/disc(Roll Tortillas not too thin, and not too thick).
  • Meanwhile, heat a Pan/Tawa and transfer the rolled tortilla on the hot tawa.
  • Cook from both sides until brown spots appear. 
  • Take it out and wrap it in a kitchen towel and do the same process with the remaining dough balls.
  • Homemade Whole Wheat Tortillas are ready, make Quesadilla, or Tacos using Tortillas. Enjoy!!!

How to Store Homemade Tortillas
  • Tortillas kept at room temperature will stay well for 2-3 days.
  • Once they have cooled down, wrap them in aluminum foil and then place it in a ziplock. When you are ready to use, take the tortillas out and warm them in a skillet.
  • For longer shelf life, refrigerate or freeze tortillas.
  • To freeze, layer pieces of parchment paper between each tortilla (or sections if you plan to thaw a stack at once). Wrap with foil or plastic wrap and transfer to an airtight container.
  • Thaw overnight and heat(cover with a damp paper towel).

Use of Tortillas:
          Tortillas are used for making many Mexican dishes like Quesadilla, Enchilada, Tacos, Pizza, and many more.

Dietary Comment:
  • The calorie count based on a 2000 calorie diet.
  • Per serving contains 60 calories, along with 12.7 g carbohydrates, 2.1 g dietary fiber, 1.5 g fats, and 1.5 g protein.
  • Portion size can always be increased or decreased depending on your health goals and activity level.
  • If you make this recipe, share your food picture with hashtag #aaichisavali on Instagram and Facebook so that everyone can enjoy it too! 
  • Subscribe to my YouTube channel for Healthy, Tasty, Instant Pot, and Air fryer recipes.
  • I love it when you try my recipes and send me pictures & feedback.

Eat Healthy, Stay Healthy!!!

Saturday, April 25, 2020

How to Make Homemade Bread with the Instant Pot
Hello Foodies, 
       There is nothing quite like a warm slice of fresh bread, and it topped with a thick pat of Maska(butter+whipping cream+sugar). Yummm! Nothing more comforting than a maska bun and tea in the morning! The best thing that would go with bread maska is a hot cup of tea, just take a bite of bun maska and sip of tea together, and bread will melt with that hot tea! There are a lot of restaurants in India that serve these Bun Maska with tea, and believe me, its a deadly combination.

        Preparing bread from scratch at home is simply exciting, and the aroma of freshly baked bread from the oven is fantastic. When I first started to bake, I found baking a challenge, but after a few tries, I became a confident baker, and now on, I bake cakes, buns, cookies, and many more. This recipe to make homemade bread is perfect. It's simple and easy to follow, takes about 2 hours to make from start to end, and yields a bread loaf as beautiful as we get it from the bakery. I have used all-purpose flour, but you can feel free and use part whole wheat flour if you'd like.  

Video Recipe:
Tips to Make the Bread:
Kneading: Knead well! Kneading dough helps to develop the flavor, gluten, and texture of the bread, so don't skimp on kneading time.

Proofing: Allow the dough to Proof well. Temperature affects how long your bread takes to rise. I like to proof the dough in the instant pot because the yogurt function of the instant pot creates the perfect atmosphere for proofing the dough.


Don't overwork the dough and don't use extra flour while kneading the dough: Try not to go crazy kneading bread after the first rise. Knead and shape the dough about a minute; then, it's back in the pan to rest for the 2nd rise. 

Some more Buns/Bread Recipes to try:

Preparation Time: 10 Minutes; Baking Time: 30 Minutes. 
Proof Time: 1 hour. 
Each slice of homemade bread contains 162 Calories. 

Ingredients:
  • All-Purpose Flour 3 ¼ cups 450 g(You can use Whole Wheat / Bread Flour too) 
  • Whole Milk 1 Cup
  • Sugar 2 Tbsp
  • Instant Yeast 1 Tsp 
  • Salt 1 Tsp 
  • Milk Powder 2 Tbsp 
  • Butter ¼ Cup, unsalted and room temperature 
  • Water ¼ or as needed to knead the dough 

Instructions:
To Prepare the Dough:
  • In a large bowl, pour milk, sugar, instant yeast, flour, salt, and milk powder and mix until well combined.
  • Now, add water and combine the ingredients and knead until a shaggy dough forms.
  • Take the dough onto the work surface and add butter.
  • Knead the dough to combine the ingredients for 1 to 2 minutes(the dough will be very sticky at this point, but do not add any extra flour) and keep kneading. 
  • Continue to knead the dough for 5-6 minutes to develop the gluten. The dough will become strong and smooth.
  • Now, knead and form the dough. 

To Proof the Dough in the Instant Pot:
  • Spray some oil to the instant pot inner pan.
  • Transfer the dough to the Instant Pot and cover the pot with the glass lid or with any plate that fits the pot(even you can use the instant pot's main lid too). 
  • Proof the dough using the yogurt function of the Instant Pot. 
  • Set the time for 30 minutes. 
  • The dough is ready when it rises to double its volume.
  • You can apply some oil on the surface of the dough to avoid the drying out of the dough.
  • Once the dough doubled in size, punch down and take out the dough and knead for one minute.

To Bake the Bread Loaf:
  • Preheat the oven to 375ºF (190ºC) for 30 minutes before baking the bread.
  • Grease the Bread Baking Pan with non-stick spray or oil.
  • Fold the dough into a rectangle(10-inches x 12-inches) with hands and roll the dough into a tight log shape and seal the seam.
  • Place the shaped dough, seam side down into the prepared Bread Pan.
  • Cover the Bread Pan loosely with the cloth/plastic wrap and Proof the dough for 20-25 minutes or until the loaf has doubled in volume.
  • When the dough has doubled, remove the cloth from the top of the Bread Pan and give a milk wash.
  • Place the pan into the oven and bake at 375ºF (190ºC) for 30 to 33 minutes.
  • Remove the baked loaf from the oven and remove the bread from the baking pan and place it on the cooling rack.
  • Apply butter over the loaf and let it cool completely to room temperature before slicing.
  • Slice the cooled loaf using a serrated bread knife and its ready to serve. 
  • Serve with your favorite spread or use to make sandwiches, I have served with Strawberry Jam. Enjoy!!! 

To Proof the dough without an Instant Pot:
  • Transfer the dough to the pot and cover the pan with the cloth and keep it aside. 
  • Allow the dough to rise for 1 hour or until double its volume. 
  • The dough is ready when its rise to double its volume.
  • You can apply some oil on the surface of the dough to avoid the drying out of the dough.
  • Once the dough doubled in size, punch down and take out the dough and knead for one minute. 
  • Follow the above baking steps. 

My Take:
  • You will get around 15 bread slices.
  • You can season bread dough with your favorite spices, herbs, and even add cheese too.
  • You can use 100% whole wheat flour instead of using all-purpose flour or bread flour. 
  • Use a good quality yeast; it gives fluffiness and softness to bread.

How to Store the White Bread:
  • Transfer the bread loaf into a plastic bag, and it will be good to eat for up to 4-5 days. 

Dietary Comment:
  • The calorie count based on a 2000 calorie diet.
  • Per serving contains 162 calories, along with 28.3 g carbohydrates, 1 dietary fiber, 3.85 g fats, and 4.2 g protein.
  • Portion size can always be increased or decreased depending on your health goals and activity level.
Good Time To Eat:
           It is good to eat white bread for breakfast, lunch, evening snack, or dinner.

  • If you make this recipe, share your food picture with hashtag #aaichisavali on Instagram and Facebook so that everyone can enjoy it too! 
  • Subscribe to my YouTube channel for Healthy, Tasty, Instant Pot, and Air fryer recipes.

Eat Healthy, Stay Healthy!!!

Friday, April 24, 2020

How to Make Crispy and Flaky Khari from Scratch
Hola Foodies,
       Khari is crispy, delicate, light, flaky, irresistible, and an evergreen accompaniment for chai/tea, and it is an Indian version of Puff Pastries. I have used homemade pastry sheets to make the Khari. 


You can make Khari with the help of store-bought puff pastry sheets too. Cut the sheets into long pieces or maybe squared. Now, bake it as we baked Puff biscuits. You can spread cumin seeds or carom seeds over it. Khari is light and flaky, and it is very easy to make minimum ingredients that you can easily find it in your kitchen pantry. Butter is layered within the dough, creating hundreds of flaky layers.


Video Recipe:

        It is the best tasting, easiest recipe for Homemade Khari ever! You can absolutely make this puff pastry sheet ahead! There may only be 15 to 20 minutes of active time for this recipe, but you will need to get it nice and cold in the fridge, so there will probably be no less than 2 1/2 hours of chill time. By forming and folding dough, we develop beautifully buttery layers and avoid overmixing.  No one can stop at one!


This Khari recipe is:
  • Easy to make
  • The perfect accompaniment for tea
  • loaded with buttery flavors
  • not too hard nor dry
  • the most delicious Khari you will ever have

Some More Puff Pastry Recipes To Try:

Ingredients:
To Prepare Puff Pastry: 
  • All-purpose flour 2 cups + 3-4 Tbsp for rolling the dough
  • Sugar 2 Tbsp
  • Butter 8-10 tbsp, unsalted, cold and cubed
  • Salt ¼ Tsp
  • Lemon Juice 1 Tbsp
  • Ice cold water as needed to knead the dough 

Instructions:
To Prepare the Pastry Dough:
  • In a mixing bowl, add all-purpose flour, salt, and sugar, and mix well. 
  • Now, add lemon juice, cold butter(4 Tbsp), and rub the butter into the flour with your fingertips until combined.
  • Pour in the ice-cold water and bring the dough together(It should be quite soft).
  • Form it into a rough dough mass, place the dough over the cling film(plastic wrap) and cover it and keep aside for 30 minutes.

To Prepare the Puff Pastry Sheet:
  • Now divide the dough into equal portions( I made 12 equal-sized balls from the dough) and using a rolling pin roll the dough to make a rectangle shape. 
  • Spread the butter over each layer of rolled dough with the help of a spatula. 
  • Take another rolled dough to place it over to the first one and do the same for remaining rolled dough (as shown in the video).
  • Cover the rolled dough with cling film and chill for 30 minutes. 
  • After 30 minutes, remove cling wrap and roll out the dough again into a rectangle shape(as shown in the video).
  • Trim the edges of the rectangle to even them out, then cut it into desired shapes (rectangle, triangle, etc. Approx 2"*3" rectangle)(If the dough feels warm, place it in the fridge again).
  • Place on a greased baking sheet, brush with ghee/milk.
  • Bake in the preheated oven at 350 F(180 C) for 20-25 minutes or until the top layer becomes golden brown. 
  • Place on the rack till thoroughly cooled before storing it in an airtight container.
  • Serve Khari with a hot cup of tea. Enjoy!!! 


Dietary Comment:
  • The calorie count based on a 2000 calorie diet.
  • Per serving contains 72 calories, along with 7.2 g carbohydrates, 3.7 g fats, and 1.1 g protein.
  • Portion size can always be increased or decreased depending on your health goals and activity level. 
  • If you make this recipe, share your food picture with hashtag #aaichisavali on Instagram and Facebook so that everyone can enjoy it too! 
  • Subscribe to my YouTube channel for Healthy, Tasty, Instant Pot, and Air fryer recipes.

Eat Healthy, Stay Healthy!!!

Wednesday, April 22, 2020

How to Make Delicious Shevaya Kheer/Instant Pot Vermicelli Pudding
Hello Foodies,
       Vermicelli Kheer/Pudding is the most popular and traditional Indian dessert made using milk, vermicelli, and a sweetener. It is creamy, rich, and a delight for the taste buds.


Instead of vermicelli, it can also be made with other ingredients like Rice, Tapioca Pearls, Coconut, Cracked Wheat, and even with Carrots. This Vermicelli/Seviyan Kheer is a simple and quick one. Making vermicelli pudding in the Instant pot is the easiest dessert I have made ever. It is indeed the perfect dish to celebrate a festival or prepare it as dessert after a hearty dinner. Vermicelli Pudding can be eaten warm, hot, or cold, so it is perfect for any season. Serving chilled kheer at the end of any dinner or lunch makes the whole experience divine! 

Video Recipe:

       Vermicelli Pudding needs no special occasions; it is part of every day daily Indian menu. It can be made in the instant pot in 5 minutes. 

Here are other Instant Pot Desserts that you might enjoy:
Preparation and Cooking Time:5 Minutes.
Each Serving of Vermicelli Pudding Contains 297 Calories.


Ingredients:
  • Roasted Vermicelli ½ Cup
  • Whole Milk 3 cups 
  • Sugar 1/4 Cup
  • Dry nuts(Almonds sliced and cashews 1 Tbsp each) 
  • Raisins 1 Tbsp 
  • Cardamom powder ½ Tsp 
  • Saffron few strands
  • Ghee 1 Tbsp 

Instructions:
  • Turn on the saute mode of the instant pot and heat the Ghee. 
  • Roast vermicelli, dry nuts, and raisins for a minute and turn off the saute mode of the Instant Pot. 
  • Pour milk, sugar, cardamom powder, and saffron strands and give it a quick stir. 
  • Close the lid of the instant pot and place the vent on the sealing position. 
  • Cook on Porridge Mode for 5 minutes and then NPR. 
  • Open the lid and mix all well. 
  • Delicious Vermicelli Pudding is ready to serve, serve warm or chilled. Enjoy!!! 

My Take:
  • You can replace green cardamom with rose water too.
  • You are preparing this kheer in IP, and if you have cooked any savory food before, then that can curdle the kheer or milk. So before cooking anything with milk, thoroughly wash the pot, lid, and sealing ring.
  • If using jaggery instead of sugar, then add it after cooking vermicelli and once it cools down. 
  • Kheer tastes extra good if refrigerated overnight. 
  • You can choose any nuts you prefer cashew nuts, pista, walnuts, and raisins, or dates can be added. 

Dietary Comment:
  • The calorie count based on a 2000 calorie diet.
  • Per serving contains 212 calories, along with 21 g carbohydrates, 5.9 g dietary fiber, 12 g fats, and 11.7 g protein.
  • Portion size can always be increased or decreased depending on your health goals and activity level.
Good Time To Eat:
           It is good to eat Shevaya Kheer as a dessert.
  • If you make this recipe, share your food picture with hashtag #aaichisavali on Instagram and Facebook so that everyone can enjoy it too! 
  • Subscribe to my YouTube channel for Healthy, Tasty, Instant Pot, and Air fryer recipes.
  • I love it when you try my recipes and send me pictures & feedback.
Eat Healthy, Stay Healthy!!!