Monday, September 30, 2019

Navratri Fast Recipes: Varai Bhat, Shengdanyachi Amti and Crispy Potato Fries

Hello Foodies,
           Varaicha Bhat / Barnyard Millets Rice is one of the best recipes to incorporate millets into our diet. Varai bhat is the recipe which forms a healthy and straightforward base or which pairs up well with the shengdanyachi amti. It is very suitable for fasting days or for a time when you wish to avoid rice or simple carbohydrates. 


           In India, cereal grains are not consumed during fasts which make varai a popular ingredient during the fasting days. The varai rice tastes almost similar to broken rice when cooked. It does not cook into separate grains like long-grained rice.

YouTube Video:

            It is tiny, white, round grain, bigger than semolina (rava) and smaller than sago (sabudana). The varai being readily available, quick to cook and yummy to taste and its ideal wholesome alternative to rice, wheat, and other less easily accessible millets. It can be given as porridge or kheer to babies between 6-7 months. In India, it is commonly used to prepare upma, khichdi, and pulav, especially during the fasting days.

Ingredients :
  • Varai Rice/Samo Rice/Barnyard Millets 1 cup
  • Potato 1 small, peeled and chopped
  • Green chilies paste 1 tsp
  • Salt 1 tsp
  • Peanuts 2 Tbsp, dry roasted
  • Cumin seeds 1 tsp
  • Veg.oil 2 tsp
  • Water 1 ½ cup

Instructions:
  • In a pan heat veg.oil and splutter cumin seeds.
  • Add green chilies paste and stir well and add chopped potatoes and saute for 2 to 3 minutes.
  • Now add peanuts and saute and add 1 ½ cup of water and salt and stir well and let it boil.
  • Add varai rice and mix well, cover and cook for 5 minutes and stir in between.
  • Add ½ cup of water and again cover and cook for 2-3 minutes or until the grains are cooked, and all the water gets fully absorbed.
  • Here, healthy and tasty varaicha / varicha bhat is ready to serve, serve hot with shengdanyachi amti(peanuts curry). Enjoy!!!


Peanuts Curry / Upvasachi Shengdanyachi Amti:
        Peanut Amti (Curry) / Shengdanyachi Amti pairs up well with tempting dishes such as sabudana khichdi, varicha bhat, and sabudana appe or vada. It can be a yummy dip to eat with potato chips during the fasting day.

 
 Ingredients:
  • Peanuts 1 cup, dry roasted
  • Green chilies 5 strips
  • Salt 1 tsp
  • Cumin seeds 1 tsp
  • Veg oil 1 tbsp
  • Coriander leaves
  • Water 2 cups

Instructions:
  • Dry roast the peanuts in a pan on a low flame till golden color, let the peanuts cool, then rub the peanuts to remove peanuts skin.
  • Now, take the peanuts in a grinder and then add green chilies, salt and ½ cup of water and grind to make a smooth paste.
  • Meanwhile, heat oil/ghee in a kadhai/pan, once oil gets hot add cumin seeds, let it splutter.
  • Now, add the peanut paste followed by 1.5 cups water.
  • stir very well.
  • On a low flame simmer the peanut amti for 5 to 6 minutes with stirring at intervals, lastly garnish with coriander leaves.
  • Peanuts amti is ready to serve, serve the peanut amti with sabudana khichdi, varai rice or sabudana vada. Enjoy!!!


My Take:
  • If amti thickens, then thin it as you like the consistency by adding water.
  • If you don't want to remove peanuts skin, then you can grind them as it is.
  • You can use red chili powder instead of green chilies.

Crispy Potato Fries for Fast/Potato Fries in Air Fryer:

         These potato fries are a healthy, vegan, and gluten-free twist on your fasting day food platter. Top it with some chilled homemade curd/yogurt or go vegan and top it with some creamy coconut milk. Either way, it is a healthy and totally addictive breakfast or lunch recipe that is super easy to make. Fasting days or any other days potato is a delight to savor and to serve.
  
      
Ingredients:
  • Potatoes 2, peeled, chopped
  • Red Chili Powder ½ Tbsp
  • Salt ½ Tsp
  • Oil for greasing the pan


Instructions:
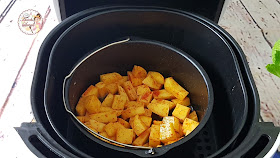
  • Preheat Air Fryer for 3 minutes at 400 F.
  • Peel, wash, and cut potatoes into small pieces.
  • Grease pan with some oil and add chopped potatoes.
  • Add red chili powder and salt and mix all well.
  • Insert the basket of the air fryer and air fry it at 400 F for 12 minutes.
  • Mix/flip after 5-6 minutes and air fry again.
  • Crispy potato fries are ready to serve, serve with yogurt or top with creamy coconut cream. Enjoy!!!
  • If you make this recipe, share your food picture with hashtag #aaichisavali on Instagram and Facebook, so that everyone can enjoy it too! 
  • Subscribe to my YouTube channel for Healthy, Tasty, Instant Pot, and Air fryer recipes.


Eat Healthy, Stay Healthy!!!

Sunday, September 29, 2019

How to Make Crispy Potato Fries for Navratri Fast / Air Fryer Crispy Potato Fries

Hello Foodies,
           This crispy potato fries recipe is for fries lovers! This Navratri try these easy peasy, 3 ingredients potato fries made in Air Fryer. I love fries made in Air Fryer, because not only is it easy and healthy, but also a great way to carve your fries cravings/fried food cravings. And these yummy, crispy and carby potatoes are one of my favorite comfort foods during fasting days (Indian fast/vrat). It is also versatile as most of the potato recipes are, so here it is. 


         These potato fries are a healthy, vegan, and gluten-free twist on your fasting day food platter. Top it with some chilled homemade curd/yogurt or go vegan and top it with some creamy coconut milk. Either way, it is a healthy and totally addictive breakfast or lunch recipe that is super easy to make. Fasting days or any other days potato is a delight to savor and to serve.
       
YouTube Video:
      
Preparation Time: 5 Minutes; Cooking Time: 12 Minutes.
Each Serving of Crispy Potato Fries Contains 81 Cal.

Ingredients:
  • Potatoes 2, peeled
  • Red Chili Powder ½ Tbsp
  • Salt ½ Tsp
  • Oil for greasing the pan


Instructions:
  • Preheat Air Fryer at 400F for 3 minutes.
  • Peel, wash, and cut potatoes into small pieces.
  • Grease pan with some oil and add chopped potatoes.
  • Add red chili powder and salt and mix all well.


  • Insert the basket of the air fryer and air fry it at 400 F for 12 minutes.
  • Mix/flip after 5-6 minutes and air fry again.

  • Crispy outside and soft inside potato fries are ready to serve, serve with yogurt or top with creamy coconut cream. Enjoy!!!


Dietary Comment:
  • The calorie count is based on a 2000 calorie diet.
  • It makes 2 servings.
  • Per serving contains 81 calories, along with 18 g carbohydrates, 2.8 g dietary fiber, 0.41 g fats, and 2.22 g protein.
  • Portion size can always be increased or decreased depending on your health goals and activity level. 


Good Time To Eat:
            It is good to eat Air Fryer Crispy Potato Fries for breakfast, lunch, brunch, or dinner.

  • If you make this recipe, share your food picture with hashtag #aaichisavali on Instagram and Facebook, so that everyone can enjoy it too! 
  • Subscribe to my YouTube channel for Healthy, Tasty, Instant Pot, and Air fryer recipes.


Eat Healthy, Stay Healthy!!!

Friday, September 27, 2019

How to Prepare Khamang Kakdiche Upvasache Thalipith

Hello Foodies,
       This crispy and savory Indian fasting flatbread kakdiche thalipeeth made using kakdi(cucumber), upasachi bhajani, green chilies, salt, and peanuts. Khamang Kakdiche thalipeeth recipe is simple and easy to make. This light meal can help your fasting to provide nourishment to the entire body. 


         Bhajani is the key ingredient for making delicious thalipeeth. In this recipe, I have made bhajani by roasting sabudana, varai, rajgira and cumin seeds and grinding them in a grinding mill(Goldenwall's High-Speed Universal Grinder). 

YouTube Video:

        Cucumbers used in traditional fasting diets and they are good for health. Cucumbers contain 95% of water and help you stay hydrated. Consuming water during fasting will help to keep your body energetic and healthy. It will also help to drain out the toxins from the body. Most of the fasting recipes are instant, and easy to make, as many spices and herbs are not allowed during fasting days. This fasting (cucumber pancake) kakdiche thalipeeth is not only quick to prepare, but it is also easiest to digest. This is healthy, gluten-free, and vegan recipe. 
           Do give it a try and prepare this healthy and tasty kakdiche thalipeeth this festive season.


Preparation Time: 10 Minutes: Cooking Time: 10 Minutes.
Each Serving of Kakdiche Thalipeeth Contains 87 Calories.

Ingredients: 
  • Cucumber/Jaldi 1 Cup, grated
  • Upvasachi Bhajani 1 Cup
  • Peanut Powder 2 Tbsp, dry roasted peanuts
  • Salt ½ Tsp
  • Green chilies 3 strips, finely chopped
  • Coriander Leaves 2 Tbsp, chopped
  • Oil for roasting thalipeeth

Instructions:
To Prepare the Dough:
  • Peel and grate the cucumber and do not squeeze out the water.
  • In a mixing bowl, add grated cucumber, peanut powder, salt, green chilies, and coriander leaves, and mix well.
  • Now, add Upasachi Bhajani and knead to make a soft dough. 
  • Grease the dough with some oil or ghee.

To Roll the Thalipeeth:
  • Cut the plastic bag, and grease it with a little bit of oil(you can use parchment paper too).
  • Divide the dough into equal portions, place the one dough ball on the plastic bag or parchment paper, and cover it. 
  • Spread the dough using a rolling pin.

To Fry or Roast the Thalipeeth:
  • Meanwhile, turn on the flame and heat tawa for frying the thalipeeth.
  • Apply some oil/ghee on the tawa.
  • Once tawa is sufficiently hot, gently transfer the thalipeeth over the tawa.
  • Flip and cook the thalipeeth on both sides.
  • Drizzle some oil/ghee while cooking. 
  • Both sides should have brown spots which mean Thalipeeth has cooked perfectly.
  • Serve Khamang Kakdiche Thalipith with crispy potato stir fry and yogurt. Enjoy!!!

My Take:
  • These thalipeeth are difficult to roll as it gets stuck on board, so use plastic or parchment paper(as shown in the video) to roll it.
  • As grated cucumber has enough water, so no need to add extra water to knead the dough.

Dietary Comment :
  • The calorie count is based on a 2000 calorie diet.
  • It makes 4 Thalipeeth.
  • Per serving contains 87 calories, along with 13 g carbohydrates, 1.2 g dietary fiber, 2.3 g fats, and 2.4 g protein.
  • Portion size can always be increased or decreased depending on your health goals and activity level. 
Good Time To Eat:
            It is good to eat kakdiche thalipeeth for breakfast, lunch, brunch, or dinner.

  • If you make this recipe, share your food picture with hashtag #aaichisavali on Instagram and Facebook, so that everyone can enjoy it too! 
  • Subscribe to my YouTube channel for Healthy, Tasty, Instant Pot, and Air fryer recipes.
Eat Healthy, Stay Healthy!!!

How to Prepare Homemade Upvasachi Bhajani from Scratch

Hello Foodies,
          This Navratri make this upvasachi bhajani(fasting flour) and relish on preparing a variety of dishes using it. This fresh flour recipe that will give you a break from the regular whole wheat flour chapati/roti. Upvasachi Bhajni is a healthy way to fast and is the perfect alternative during the fasting season of Navratri. It is an easy homemade flour recipe and just takes about 15-20 minutes to prepare from scratch. Using this flour you can make dishes for breakfast, lunch, and dinner too. The aroma and taste of this gluten-free and fasting flour make it favorite.


         During Navratri, most of the people give up non-vegetarian food and also eliminate onion-garlic from their meals. During Navratri delicacies such as Sabudana Khichdi, Sabudana Kheer, Nylon Sabudana Chivda, Shengdanyachi Amti, Varaicha Bhat, Rajgira Puri, and Peanuts Ladoos are some of the most popular dishes cooked during the Navratri season. 

YouTube Video:

         So give it a try and prepare this healthy flour at home this festive season.

Preparation and Cooking Time: 15 Minutes.
Each Serving of Upasachi Bhajani(100 g)Contains 216 Calories.


Ingredients:
  • Sabudana/Tapioca Pearls 1 cup
  • Varai/Samo/Barnyard Millets 1 cup
  • Rajgira p/Amaranth ¼ Cup
  • Cumin seeds/Jeera 1 Tbsp 
Instructions:
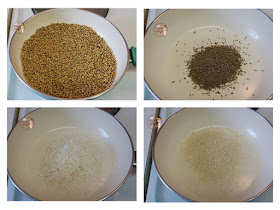
  • Dry roast sabudana on medium to low flame for 4-5 minutes or until it turns light pink.
  • Dry roast varai on medium to low flame for 4-5 minutes or until it becomes light pink color.
  • Also, dry roast rajgira over low flame till light pink.
  • Dry roast cumin seeds on low flame for a minute. 
  • Let it cool completely and mix all ingredients before grinding.

  • In a grinder, jar add roasted mixture/bhajni
  • Close and lock the lid of the Goldenwall's High-Speed Universal Grinder tightly.
  • Plug in and turn on the timer(1 minute) switch, then turn on the switch for grinding (you can hear rolling sound).
  • Turn off the switch, (You can hear the rolling sound evenly, that means mixture have ground into smooth powder, then you can turn off the switch).
  • Also, don't forget to disconnect the power supply before opening the lid.
  • Open the lid and brush or spoon the powder out and using strainer strain it.
  • Khamang Upasachi Bhajani is ready to prepare thalipeeth, upvasacha vada. Enjoy!!!

My Take:
  • Apply ½ tsp ghee to sabudana to avoid sticking while roasting.
  • Do not roast ingredients till they become dark color; otherwise, the flour blend won’t taste good.

Dietary Comment:
  • The calorie count is based on a 2000 calorie diet.
  • Per serving(100g) contains 216 calories, along with 45.4 g carbohydrates, 3 g dietary fiber, 2 g fats, and 5.24 g protein.
  • Portion size can always be increased or decreased depending on your health goals and activity level. 
  • If you make this recipe, share your food picture with hashtag #aaichisavali on Instagram and Facebook, so that everyone can enjoy it too! 
  • Subscribe to my YouTube channel for Healthy, Tasty, Instant Pot, and Air fryer recipes.
Eat Healthy, Stay Healthy!!!

Wednesday, September 25, 2019

Unboxing and Review of High-Speed Universal Grinder (Goldenwall)(300 g Small Household Superfine Grinder High-Speed Universal Mills)

Hello Friends,
           Finally, I found this grinder that can make all Indian spices powder within a minute. I have been on a mission for three years(or since moved to the United States) to find a blender that will grind a variety of Indian spices, grains, and herbs to a fine powder. Before I bought this, I have been using tabakh mixer grinder, and the spice jar of my mixer was not working. I couldn't find a replacement for this jar in here. That thing influenced us quite a bit to go ahead and get this. So we decided we would go ahead and share the unboxing and review of this product, that can be helpful to you guys. 


           If you have seen a video or going to watch after reading, you can see the box very well packaged. Along with the grinder machine, they have given sifter, brush, extra blades and springs, and manual. It has three blades; the device is lightweight, easy to carry, and cleaned. Included sifter and brush is a nice touch. 

YouTube Video:

This stainless steel high-speed grain grinder mill is beautifully designed.  You can swing the body of the machine to pour the powder out. Swing type is more convenient. The grinder is safe and saves electricity, which grinds the fine powder within a minute. It needs only 1-2 minutes to make a fine powder.   There is also an overload protection button, which will automatically start when the grinder is overload. It is a bit noisy, but that is only because it is doing a great job. We highly recommend it. 


Voltage: 220/50HZ or 110V.
Capacity: 300 g
Grinding Fineness: 30-300 mesh
Working Time:0-5 Minutes
Interval/Resting Time:5-10 Minutes.
Speed: 28000/min
Crush Level: Superfine Powder Grinder
Commercial motor


        Here is sharing some tips, the power switch/timer knob took a minute to figure out, and the manual depicts a slightly different model that has a separate power switch. So I figured out that you can turn the field button clockwise very slightly and hold it in the on position. I think that will help you. 
        The second tip, before turning on the power, make sure the shaft nut was tight. Make sure when using that you tighten as light as you possibly can. 
       So far I have used it to make Goda Masala Powder, Coriander Powder, Grains Flour. It does pretty well and really fast to turn my spices, grains, beans into powder. It does exactly what promises. 


       So, guys, I am so pleased with this item. It is worth every penny. You will be thrilled you bought this if you have been in the same circumstances as me.

         This machine can quickly smash all kinds of dehydrated food, rice, corn, sesame, soybean, fish feed, pepper, and many more.

Authentic Maharashtrian Goda Masala / गोडा मसाला / काळा मसाला
Hello Foodies,
          When I need to cook up a quick curry with some basic ingredients, I relied on my Aai's(mother's) goda masala powder. Since I moved to the United States, I was using Goda Masala sent by my Aai(Feeling Nostalgic). Whenever we miss our back home food, I use my Aai's homemade masala to make homestyle dishes and munch on that. When we bought this High-Speed Universal Grinder, then I decided, why not learn to make Goda Masala from my Aai. Then I told her to teach me, and she was super happy by knowing that I am interested in making my own Goda Masala from scratch. So here shared recipe is my beloved Aai's recipe.


            I was not making my spices powder before because I had some problems with my mixer grinder. But when Dr.K(My Husband) bought this High-Speed Universal Grinder, I am pleased with this grinder and its results. And now I can grind and make any spice blend, grain flour or herbs by myself at home.
YouTube Video:

            I always love to use whole spices; they have the best flavor. Indian cuisine is known for its exotic, and complex flavors, which are created using a variety of flavorsome spices. These popular Indian spices are excellent for preparing flavourful, appealing and intense dishes. Without these spices, Indian food dishes are unimaginable. India has a long and profoundly involved history with the spice trade, and Indian cooks use many more spices and seasonings. There is nothing that can't be loved about this delicious cuisine, especially the homemade flatbreads, and varieties of pulao and biryani served with nearly every meal. 


             I have bloomed some spices in oil, and this blooming process takes a few seconds. Oil roasting of spices increase the shelf life of Masala Powder and brings out the aroma from the whole spices. Also, have dry roasted some spices to make it more aromatic. So, prepare this Goda Masala at home and trust that this goda masala powder will take your cooking to the next level. There is no comparison to the rich flavor and quality of this homemade goda masala. I use it to make several meat dishes; some Maharashtrian style beans stir fry(usal) or amtis to make healthy and tasty dishes. 
  • Many different kinds of Goda Masala recipes can be found depending on ingredients used, regional preference, and personal taste. 
  • Also, In some places, goda masala is called Kala Masala, which is due to the proportions of certain spices and the degree to which they are roasted.
  • Goda masala tastes pungent, but not hot.
  • Goda masala is the base or main ingredient for most Maharashtrian curries and dals/aamti.

        So if you guys love the aroma of spices in your food? Then try this goda masala and include this homestyle traditional Goda masala powder in your daily diet. Apart from tingling the taste buds, Indian spice mixes are packed with nutrients and provide loads of goodness for you and your family. So let's get started!
Preparation Time: 15 Minutes; Roasting Time: 20 Minutes; Grinding Time: 5 Minutes; Total Time: 40 Minutes.

1 Tbsp of Goda Masala Powder Contains 21 Cal.


Ingredients:
  • Coriander Seeds/ धने 125 g
  • Cumin seeds / जीरे ¼ Cup
  • Sesame seeds / पांढरे तीळ 25 g
  • Coconut grated / सुकं खोबरं ½ cup
  • Dried Kashmiri Red Chili / काश्मिरी लाल मिरची 12 g
  • Byadgi Mirchi / ब्याडगी मिरची 13 g
  • Cloves / लवंग 3 g
  • Cinnamon / दालचिनी 5 g
  • Black Cardamom / मसाला वेलदोडे (जंगली वेलची) 5 g
  • Bay leaf / Tamalpatra 4-5 leaves तमालपत्र
  • Black stone flower/ Kalpasi / दगडफुल 3 g
  • Mesua Ferrea / नागकेसर (नागचाफा) 3 g
  • Star Anise / बादलफुल 3 g
  • Asafoetida Powder / हिंग ½ Tbsp
  • Turmeric / हळद 1 Tbsp
  • Salt / मीठ 1 Tsp
  • Oil / तेल 2-3 Tsp for trying spices


Instructions:
To Dry Roast the Spices:
  • Dry roast coriander seeds for 4-5 minutes on medium o low flame, or until it becomes aromatic.
  • Dry roast cumin seeds for 2-3 minutes on medium to low flame, or until it becomes aromatic.
  • Dry roast coconut for 4-5 minutes on medium to low flame, or until it becomes golden brown color.
  • Dry roast Sesame Seeds for 1-2 minutes on medium to low flame.
To Oil Roast the Spices:
  • Heat 2-3 Tsp oil in a pan on medium to low flame.
  • Roast cloves, black cardamom, nagkesar, bat leaves, cinnamon, black stone flower, red chilies and byadgi mirchi in oil separately.
  • Make sure you are roasting all these spices in oil and separately.
  • Roast for few seconds, roasting these spices doesn't need more than 30-40 seconds.
  • Let the roasted spices cool completely before grinding.

To Grind the Roasted Spices:
Coriander Seeds:
  • Open the upper cover or top lid of the grinder(High-Speed Universal Grinder), and add roasted coriander seeds.
  • Close the lid of the grinder tightly.
  • Plug in and turn on the timer(1 minute) switch, then turn on the switch for grinding (you can hear rolling sound).
  • Turn off the switch, (You can hear the rolling sound evenly, that means coriander seeds have been ground into smooth powder, then you can turn off the switch).
  • Also, don't forget to disconnect the power supply before opening the lid.
  • Open the lid and brush or spoon the powder out and using strainer strain it and keep aside.

Cumin Seeds:
  • Add dry roasted cumin seeds into the grinder, close the lid tightly and grind it for 1 minute.
  • Open the lid and spoon the ground powder out, and using strainer strain it and keep aside.
Coconut (Dry/Desiccated) and Sesame Seeds:
  • Add dry roasted coconut and sesame seeds into the grinder, close the lid tightly and grind it for 1 minute.
  • Open the lid and spoon the ground mixture out and keep aside.

Oil Roasted Spices and Chilies:
  • Add roasted bay leaves, black cardamom, cinnamon, black stone flower, cloves, nagkesar, star anise, Kashmiri red chili, and Byadgi mirchi into the grinder, close the lid tightly and grind it for 1 minute.
  • Open the lid and spoon the ground mixture out and strain it and keep aside.


To Prepare/Assemble Goda Masala (Kala Masala):
  • In a mixing bowl add oil roasted spices and chili powder, cumin and coriander powder, coconut and sesame seeds, turmeric, asafoetida, and salt.
  • Mix all well.
  • To combine well grind all together one more time for 40-45 seconds.
  • Flavourful, Homestyle Goda Masala Powder is ready to make tasty dishes. Enjoy!!!
To Store Goda Masala and its Shelf life:
  • Store Goda Masala in an airtight container in a dry, cool, dark place.
  • If placed in an airtight container, it stays good for more than a year or two.

My Take:
  • You can use Indian mixer grinder, coffee bean grinder too.
  • Here I have used High-Speed Universal Grinder, so it takes me 5 minutes to grind all spices, but if you are using mixer grinder it will take a little bit more time.
  • If you like then skip roasting spices in oil and just dry roast spices and blend it.
  • Oil roasting of spices increase the shelf life of Masala Powder and brings out the aroma from the whole spices.
  • You can skip Byadgi Mirchi and can use Kashmiri red chilies only.

Dietary Comment :
  • The calorie count is based on a 2000 calorie diet.
  • Per serving contains 21 calories, along with 2.5 g carbohydrates, 1.54 g dietary fiber, 1.41 g fats, and 0.61 g protein.
  • Portion size can always be increased or decreased depending on your health goals and activity level. 

Health Benefits Goda Masala:
  • It has antibacterial properties.
  • Improves digestion.
  • Fight disease and boost immunity
  • Increase vitamin-mineral and protein absorption.
  • It works as a nutrient bomb
  • Rich in antioxidants
  • It has antimicrobial and antifungal properties.
  • Boost Metabolism.
  • If you make this recipe, share your food picture with hashtag #aaichisavali on Instagram and Facebook so that everyone can enjoy it too! 
  • Subscribe to my YouTube channel for Healthy, Tasty, Instant Pot, and Air fryer recipes.

Eat Healthy, Stay Healthy!!!