Tuesday, November 27, 2018

How to Make a trendy number/letter cake - Eggless Tart Cake / Eggless Cookie Cake

Hello Foodies,
        28th November is a very special and memorable day, on this day an enthusiastic Indian

girl was hitting the button “Publish” for the very first time! At that time I didn’t really know what I was doing. My only desire was to talk about my culinary arts and what and how to eat Indian food to be healthy and fit and keep in touch with my friends and family. This day marked two very important and special anniversaries - 2 years of our blogging journey and 3 years of togetherness (my husband and me). It’s our blog’s second birthday. OMG! Time flies so fast but time does fly when you are having fun. My McDreamy (Husband) is the person behind this achievement and he constantly encouraging me to do more with my passion for food. I can hardly believe that it has been two years already since I took my first baby steps into the Blogging world. It’s been a fantastic year and a great learning experience. And It would have never been possible without your support! On this special occasion, I would like to thank all my blog readers, family members, friends and followers on Social Media. You all are my inspiration. Thank you all for your time, comments, likes, shares and motivation.
         This is my favorite post, and it's because my little baby(my blog) turned 2 today. And to celebrate this moment I have prepared this 2018’s trendy cookie cake. It's fun making this trendy cake, it's tricky at the same time to turn it into an eggless version, and I am happy with the outcome. I feel it's adventurers when it comes to trying anything that is on trend. Feeling good to share with you my own eggless trendy cookie cake version. You may use any stabilized cream filling, here I have used whipped cream and stabilized with cream cheese and sweetened it with powdered sugar. You may use mascarpone whipped cream, chocolate ganache, gelatin too. This trendy cake is either known as cream cake, cream tart, number or letter cake or cookie cake. Cookie layers filled with your favorite frosting and decorated with fresh fruits and flowers, chocolates, sprinkles. This cookie cake recipe, new cake trend will make a great Christmas or new year dessert.
           And yes, I have given a try to this new trend of cookie cake and made my own version. I am in love with this trendy biscuit cake. I have been so eager to create this current trending cake style and finally nailed it. Yay!

         
Preparation Time: 20 Minutes; Baking Time: 12-15 Minutes.
Freezing Time: 30 Minutes; Total Time: 65 Minutes.

YouTube: 

Ingredients :

  1. To Prepare Tart / Cookie :
    1. All-purpose flour 2 cups
    2. Unsalted Butter 1 cup(2 sticks)
    3. Powdered sugar ½ cup
    4. Brown sugar ½ cup
    5. Milk 2 tbsp(optional)
    6. Baking soda 1 tsp
    7. Vanilla Extract 1 tsp
    8. Salt ¼ tsp (if you are
      using salted butter then skip salt).
  2. To Prepare Cream :
    1. Heavy whipping cream 2 Cups
    2. Powdered Sugar ½ Cup 
    3. Cream cheese 1 cup (8 Oz)
    4. Vanilla Extract 1 Tsp
  3. To Decorate the Cake :
    1. Oreo biscuits
    2. Strawberries 
    3. Chocolates
    4. Edible emojis
    5. Flowers
    6. Sprinkles 

Instructions :

  1. To Prepare Cookies:
    1. In a bowl sift together all-purpose flour, salt, baking soda and keep it aside.
    2. Meanwhile, whip/beat butter, powdered sugar, and brown sugar till smooth and creamy
      mixture.
    3. Now, add vanilla extract and milk to the butter, sugar mixture and mix all well.
    4. Now, add dry ingredients to the butter mixture and mix well and make a dough.
    5. Cover with cling wrap and freeze for 30 minutes.
    6. After 30 minutes, take
      out dough from freeze and divide it into 2 equal parts.
    7. Roll each piece of dough between two pieces of parchment paper(approx. 9” diameter and 5 mm thickness).
    8. Use 8” pan to cut the circle and remove the excess dough.
    9. Use 4” bowl or cutter to
      cut the center circle and remove the excess dough.
    10. Repeat with the other piece of dough.
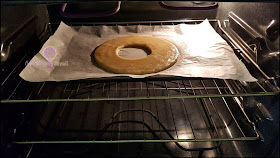
    11. Preheat oven at 350F (180C) and bake for 12-15 minutes or until it turns a golden brown color.
    12. Let the cookies cool completely before frosting.
  2. To Prepare Cream Cheese Frosting :
    1. Beat cream cheese until it becomes smooth.
    2. Whip/beat together heavy cream, sugar and vanilla extract for 3 to 4 minutes or until stiff peak forms. 
    3. Now, add cream cheese and beat until mix all well.
  3. To Assemble the Cake :
    1. Put frosting in a piping bag with a round trip(I have used Wilton round tip 2A).
    2. Place one piece of cookie on the cake board and pipe even dollops of frosting on top of the cookie.
    3. Top with the other cookie and pipe again with frosting.
    4. Decorate the trendy
      cake with flowers, berries, meringues kisses, chocolates and sprinkles, edible emojis and snowflakes. 
    5. Refrigerate until ready to serve. Enjoy!!!

My Take:

  1. Once made, this trendy cake should be served within 6-8 hours because the filling could soften the cookies quickly.
  2. You may make the cookie layers in advance. Store the cookies at room temperature, wrapped in plastic wrap for 3 days.
  3. You may make the frosting ahead, cover and store in the fridge for overnight.
  4. You may decorate cookie cake with fresh flowers, chocolates, candies.
  5. Sounds pretty easy right? Give it a go this Christmas season, I promise you won’t regret it!

Dietary Comment :

It makes 10 servings. Based on a 2000 calorie diet. Each serving contains 490 calories, along with carbohydrates - 35.86 g, fats - 37.62 g, proteins - 5.2 g.

Good Time To Eat :
            It's good to eat cookie cake as a dessert!

Eat Healthy, Stay Healthy!!!

Saturday, November 24, 2018

#IQCG  #IQCG53

Hello Friends,
        Mandala is a Sanskrit word, and it means a circle. It represents wholeness. Quilled

mandala is a simple and beautiful piece of art. I love to draw mandalas and also love paper quilling art, so I am happy to share my own work, quilled mandala design. Learn how to use a paper quilling technique to make a stunning quilled mandala in this tutorial. This technique gives such a perfect and beautiful look; it is gorgeous!!  This is a great project to create and frame up for yourself or as a gift for a loved one.

YouTube:


Things You Need:

  1. Quilling strips
  2. Slotted Quilling Tool
  3. Scissor
  4. Glue
  5. Canvas
  6. Half cut pearls
  7. Twizzer


Thursday, November 22, 2018

Start your day by preparing this super fast, healthy and protein-rich paneer bhurji or cottage
cheese scramble and serve it with slices of bread. This is an easy to make Indian breakfast. You can enjoy this Bhurji guilt-free for breakfast, lunch, snacks or for dinner too. Or you may pack bhurji into your lunch box also. This is easy to make one pot recipe and ready in 15 minutes!
          In 1 serving of paneer bhurji, you can receive 7.21 g of protein, 3.1 g of dietary fiber, and minerals. For vegetarians, this is one of the best ways to get enough protein to help build and repair lean muscles.


Preparation and Cooking Time: 15 Minutes.
Each serving of Paneer Bhurji contains 140 Calories.

YouTube:

Ingredients :

  1. Paneer / Cottage Cheese 1 Cup (crumbled)
  2. Onion 1 medium, finely chopped
  3. Tomato 1 small, finely chopped
  4. Green pepper ¼ Cup, chopped
  5. Cumin Seeds 1 Tsp
  6. Green Chillies 3 strips, finely chopped
  7. Ginger-garlic paste 1 Tbsp
  8. Turmeric 1 Tsp
  9. Coriander Powder 1 Tsp
  10. Garam Masala 1 Tsp
  11. Red chili powder ½ Tbsp
  12. Salt 1 Tsp
  13. Coriander / Cilantro 2 Tbsp, chopped
  14. Veg. Oil 2-3 Tsp

Instructions :

  1. Heat oil in a pan and splutter cumin seeds and add green chilies and saute.
  2. Now add chopped onion, saute and cook for 3 to 4 minutes.
  3. Add tomatoes, green pepper and cook for 2 to 3 minutes.
  4. Add ginger-garlic paste, turmeric, coriander powder, garam masala, red chili powder, salt, and the crumbled paneer and saute.
  5. Mix and cook for 2 to 3 minutes and switch off the flame.
  6. Add chopped coriander and mix well.
  7. Here, Paneer Bhurji is ready to serve, serve hot with chapatis or with slices of bread. Enjoy!!!

Dietary Comment:

It makes 3 servings. Based on a 2000 calorie diet.
Per serving contains 140 calories, along with carbohydrates - 13.31 g, dietary fibers - 3.1 g, fats - 7.38 g, proteins - 7.21 g.

Health Benefits of Paneer Bhurji:

  1. In 1 serving of paneer bhurji, you can receive 7.21 g of protein. For vegetarians, this is one of the best ways to get enough protein to help build and repair lean muscles.
  2. Paneer contains lots of omega-3 and omega-6 fatty acids that help fight with rheumatoid arthritis.
  3. Keep hair and skin healthy: The consumption of paneer can give us healthy hair and nails because of its vitamins, protein, omega-6 fatty acid and antioxidants contents.
  4. Digestion: Paneer can improve your digestive systems because it can promote the hydrolysis of protein.
  5. Paneer is a high protein food having a high level of calcium and phosphorus which helps in building strong bones and teeth.
  6. Cumin seeds help in digestion and also prevents constipation.
  7. Chilies help in digestion and also contain small amounts of vitamin C.

Good Time To Eat :
             It is good to eat paneer bhurji for lunch, breakfast as well as an evening snack.

Tuesday, November 20, 2018

Hello Foodies,
           Sharing one of my childhood favorite dessert, Malida. Do you like Tup-Sakhar-Poli

(ghee-sugar-wheat chapati)? I love Tup-Sakhar-Poli and If you like it, I am sure that you will also love this healthy, hassle-free and tempting dessert. I grew up eating it. Malida / Maleeda is sweet made with whole wheat flour, jaggery / gul,  ghee / clarified butter and dry fruits. It is usually made on religious and auspicious occasions. At my home, it's mainly prepared on the day of rangpanchami as a prasadam or offering to God. It’s nutritious, healthy and delightful dessert.
           The addition of Jaggery and nuts to the Malida increases the nutritional value of this sweet. Jaggery has the ability to cleanse your body, helps in digestion and also contains iron that can help to avoid the risk of anemia in all age groups.


Preparation Time: 2 Minutes.
Each serving of Malida contains 150 calories.

YouTube


Ingredients :

  1. Whole wheat flour chapati 3
  2. Jaggery ½ cup, grated
  3. Ghee / Butter 2 Tsp
  4. Almonds for garnishing (optional)

Instructions :

  1. In a grinder add chapatis, jaggery, ghee and grind it, that will help you to mix all the ingredients very well.
  2. Garnish with dry fruits and quick, sweet and healthy dessert, malida is ready to serve. Enjoy!!!

My Take :

  1. I have used fresh chapatis, you may use leftover chapatis too.
  2. Instead of ghee or butter, you can use 2 tbsp milk too.
  3. To make a vegan version just replace ghee by adding coconut oil or coconut milk.

Dietary Comment:

It makes 4 servings. Based on a 2000 calorie diet. Per serving contains 150 calories, along with carbohydrates - 27.5 g, dietary fibers - 2.88 g, fats - 8.15 g, proteins - 3.2 g.

Health Benefits of Malida:

  1. Fiber: wheat and jaggery is an excellent source of fiber. It provides 3 g of fiber per serving.
  2. Low in fat: Wheat fits well in a low-fat diet. It has no saturated fat and cholesterol.
  3. It is a power packed cereal which has all the essential vitamins and minerals.
  4. It also has a very low glycemic index.
  5. Anti-inflammatory properties: It has anti-inflammatory properties and hence is very useful in chronic inflammatory diseases such as osteoporosis, diabetes or heart diseases.
  6. It provides instant energy, as it is high in carbohydrates.
  7. It helps to prevent constipation, by activating digestive enzymes, which helps in digestion of food.
  8. It helps to flush out toxins from the body, it acts as a detox.
  9. Purifies blood - jaggery has the ability to purify the blood. When consumed on a regular basis and in limited quantities, it cleanses the blood, leaving your body healthy.
  10. Anemia - Jaggery is rich in iron and folate which help prevent anemia by ensuring that a normal level of red blood cells is maintained. This is especially beneficial for pregnant women.

Good Time To Eat:
             It is good to eat malida as a dessert or snack.

Eat Healthy, Stay Healthy!!!

Monday, November 19, 2018

Hello Everyone,
        Winter season has already started here and to create warmness/comfort in your body this
winter season, How do you incorporate sesame seeds, nuts, in your daily diet? Sesame seeds are known to be a type of fiber that can generate heat, so it is used to keep the body warm during the winter months. So get crunchy this winter with seeds, nuts and prepare this sesame karanji.
        I have prepared this Tilachi / Pudachi Karanji to celebrate Tulsi-Vivah(तुळशीची लग्न/देव दिवाळी) Dev-Diwali. The rich flavor of roasted sesame seeds and coconut, dry nuts and the intense aroma of cardamom powder, made this karanji very special and that nobody can resist. Any celebration is incomplete without sweet so here's this crispy, aromatic and delightful tilachi karanji recipe.
       The method to prepare this layered karanji is very easy and foolproof if you follow the instructions correctly, you will find it completely worth the effort. 

YouTube Video:


Ingredients :

  1. To prepare Stuffing for Karanji :
    1. Sesame seeds (white) / Til 1 Cup
    2. Desiccated Coconut ½ cup
    3. Jaggery / Gul 1 cup, grated
    4. Dry fruits 3 Tbsp, crushed
    5. Cardamom Powder 1
      Tsp
  2. To Prepare Satha / Layering:
    1. Rice flour/ Corn Flour 2 Tbsp
    2. Molten Ghee 2 Tbsp
  3. To Prepare Dough :
    1. All Purpose Flour / Maida 1 ½  Cup
    2. Semolina/ Rava / Sooji ½ Cup
    3. Ghee 4 Tsp
    4. Milk/water to knead the
      dough ½ - 1 cup
    5. Salt 1 pinch
    6. Veg oil for frying

Instructions :

  1. To Make Stuffing :
    1. In a pan dry roast sesame seeds, coconut for 2-3 minutes each on low to medium flame and let them cool.
    2. In a grinder add roasted
      sesame seeds, coconut, crushed nuts, and cardamom powder and grind to make a coarse powder.
    3. Now, add jaggery and grind to mix all and stuffing is ready.
  2. To Prepare Layering / Satha:
    1. Meanwhile, mix melted ghee and corn or rice flour to form a smooth
      paste(Satha/Layering) and keep aside.
  3. To Make Dough for Karanji :
    1. In a mixing bowl add all purpose flour, rava, and a pinch of salt and mix all well.
    2. Heat ghee and add it to the flour and mix well (ghee should evenly be mixed with the flour).
    3. Now, by adding milk
      using milk knead the dough(the dough should be pliable but yet not as soft as for rotis, it should be a little hard).
    4. Keep the dough covered using a wet cloth for 30 minutes.
    5. After 30 minutes, grind dough in a mixer grinder, or you may use a food processor to make it soft or knead the dough using hands to make it soft.
  4. To Make Karanji :
    1. Divide the dough into equal parts and roll each
      dough ball into a 10 - 12-inch circle.
    2. Start with the first rolled circle, apply a thin layer of corn flour- ghee paste and put the second circle on top of the first and apply a thin layer of corn flour paste on it.
    3. Lastly, put the third layer of a circle and apply the paste on it.
    4. Roll the three layers
      tightly to form a long roll and cut the roll into equal discs.
    5. Roll each disc into 2.5” - 3” circle and put 1 Tbsp sesame - coconut stuffing in the center.
    6. Apply some milk on edges using your finger and then fold the circle over to form a semicircle with the edges sealing the filling inside.
    7. Once the karanji is sealed firmly, using designer knife make designs or using a fork press the ends to form a nice pattern or the edges can also be folded into small pleats.
    8. Place the filled karanjis onto a wet towel to avoid drying.
    9. Heat oil in a kadhai and fry the karanjis on low flame till golden brown.
    10. Remove the paper towel and let them cooled down and store in airtight container.
    11. Tadaa, crispy outside, yet moist and yummy Karanjis are ready to serve. Enjoy!!! 

My Take :

  1. To prepare dough 3/4th cup of milk should sufficient, but depending on the rava, you may need more or less to make a firm dough.
  2. Do not flatten the disk at its center by pressing on the top as the layers may start opening as you roll them.
  3. If you don't want to make sathyachi/ Pudachi karanji, you can entirely skip the process of making corn flour and ghee layering and directly make small balls from the dough and with the help of a rolling pin, roll it flat (same as the size of a poori). Stuff with prepared stuffing and fry them.
  4. Make sure while stuffing karanji, that no air bubbles remain or formed inside.

Dietary Comment:

It makes 33 servings. And Based on a 2000 calorie diet.
Per serving contains 140 calories, along with carbohydrates - 11.56 g, dietary fibers - 1.15 g, fats - 8.4 g, proteins - 2.1 g.

Good Time To Eat:
             It is good to eat tilachi Karanji as a dessert or snack.

Eat Healthy, Stay Healthy!!!

Saturday, November 17, 2018

Hello Foodies,
Happy Children's Day to all Children's out there!
            Are you thinking about what to make for Children's day party celebration? Here is my way to celebrate this children's day, I have prepared this Homemade edible instant emoji milk peda, emoji jellos, chocolate paratha, ice-cream sandwich, chocolate bhel, homemade chocolate, and rose-coconut jellos. Surprise your kids, family, and guests by preparing these lovely, super sweet recipes. This will definitely be a rocking idea for a kids party and will be a tempting dessert for adults too! This is a perfect sweet treat to your kids and family will love to try them, even easier to make. They look so pretty and elegant. So let the food be part of the party. Make it fun, interactive, kids like to play with their food.

YouTube Video:


Children's Day Recipes :

  1. Emoji Milk Peda
  2. Chocolate Bhel
  3. Emoji jellos
  4. Chocolate Paratha
  5. Homemade Chocolate
  6. Rose-coconut jellos
  7. Ice-cream Sandwich

Hello Foodies,
         Are you baking pies, cakes, cookies or cupcakes this Thanksgiving? I am. Here are some
of my decorated cupcakes. They just look like adorable little turkeys, these turkey and owl cupcakes are best and are going to be the cutest treats on the table. There's no denying that these cupcakes, completely an edible. Owls and turkeys made them an excellent choice for parties and are so easy to make this Thanksgiving.

YouTube Video:

1) Thanksgiving Owl Cupcake: 

  1. To make owl's body: Roll chocolate fondant and using a round cookie cutter cut the circle. Using cutter cut a small portion away from the top of the circle. Using toothpick give the owl a stitched look by embossing the outer edge.
  2. To make owl's tummy: Roll pink color fondant and use a
    heart-shaped cookie cutter and give the stitching effect and glue the tummy.
  3. To make the eyes: Roll white fondant and using a round icing tip cut the two circles. Trim the top of small white circles and add black fondant to the white fondant and glue the eyes.
  4. To make the beak: Use orange fondant and cut it into a small triangle and glue the beak.
  5. To make owl's headdress: Roll and cut a long strip of orange fondant and give it a emboss pattern and glue the headdress.
  6. To make wings: Roll chocolate fondant and cut the scalloped circle and cut them into four and use two of them and glue the wings to the side of the owl's body.
  7. Lastly, assemble cupcake.

2) Thanksgiving Turkey Cupcakes:

  1. To make Tail(feather) of Turkey: Roll orange fondant and cut out circle and score into the center of the circle. Similarly, do with red and yellow fondant circles. Glue these circles and cut a small slice from the layered circles.
  2. To make the Face: Roll chocolate fondant and cut out a small circle.
  3. To make Eye: Roll white
    fondant and using round icing tip cut the two circles and glue black fondant to the white fondant and glue the eyes.
  4. To Make Beak: Roll pea sized fondant and give it teardrop shape and mark the sides of the beak to create a slight opening. Glue the beak onto the face and create nostril into the upper part of the beak.
  5. To make Wattle: Roll pea size red fondant, thicker on one end than other and glue.
  6. To make Feet: Roll 2 pea sized orange fondant and give it a teardrop shape and flatten it. Make two incisions for the toes, spread the toes and soften the cut edges.
  7. Lastly, assemble the cupcake.


If you are in need of a quick and delicious pie recipe for Thanksgiving, try my gulab jamun pie recipe!

Thursday, November 15, 2018

Hello Foodies,
           I have prepared this simple, tangy and spicy rajma masala in Instant Pot and in an

onion-tomato base. Kidney beans curry is basically made using raw kidney beans which are soaked and then cooked with onions, tomatoes and with some Indian spices called. It tastes good when you eat it with plain or jeera rice, roti, chapati or naan.
           Beans make an excellent source of protein for vegetarians and vegans. They are lower in calories and higher in dietary fibers. These Kidney shaped beans are good in simmered dishes where they absorb the flavors of seasonings and the other ingredients with which they are cooked. When combined with whole grains such as rice, kidney beans provide virtually fat-free high-quality protein.


Preparation Time: 10 Minutes; Cooking Time: 16 Minutes.
Each serving of red kidney beans curry contains 150 calories.

YouTube Video


Ingredients :

  1. Red Kidney Beans / Rajma 1 cup, soaked in water overnight / 8-10 hours
  2. Onion 1 medium, chopped
  3. Tomato puree 1 Cup
  4. Ginger-garlic paste 1 Tbsp
  5. Green chilies 3 strips, finely chopped
  6. Garam Masala 1 Tsp
  7. Coriander powder 1 Tsp
  8. Cumin Powder 1 Tsp
  9. Red chili powder ½ tbsp
  10. Turmeric powder 1 Tsp
  11. Salt 1 Tsp
  12. Cumin seeds 1 Tsp
  13. Coriander leaves ¼ cup, chopped
  14. Olive oil 2 Tbsp
  15. Water ½ cup

Instructions:

  1. Wash and soak rajma for overnight or 8 to 10 hours in the water.
  2. Turn on sauté mode of instant pot and heat olive oil and splutter cumin seeds and saute green chilies.
  3. Now, add chopped onion and ginger-garlic paste and cook for a minute and add tomato puree and mix well.
  4. Now add coriander powder, cumin powder, garam masala, turmeric powder, red chili powder, salt and half of the coriander leaves and mix all well.
  5. Lastly, add rajma and ½ cup of water and mix all well.
  6. Cook on - Put the vent in sealing position.
  7. Pressure Cooking Method: High-Pressure manual for 6 minutes and
  8. Pressure Release Method: 10 minutes natural pressure release, then release remaining pressure manually
  9. Stir well and if needed, add water to get the desired consistency.
  10. Garnish with remaining coriander leaves and rajma is ready to serve. Enjoy!!!

My Take:

  1. You may replace olive oil by adding ghee/butter/coconut oil.
  2. While cooking kidney beans, instead of water, you may add milk 1 cup.


Dietary Comment :

  1. It makes 4 servings.. Based on a 2000 calorie diet. Per serving contains 150 calories, along with carbohydrates - 16.76 g, dietary fibers - 5 g, fat - 7.4 g and proteins - 5 g.

Health Benefits of Kidney Beans:

  1. Beans make an excellent source of protein for vegetarians and vegans.
  2. Beans are also lower in calories and saturated fat than some other protein sources, such as dairy products.
  3. Dietary fiber: Kidney beans are rich in soluble and insoluble fiber. It helps to increase stool bulk and prevent constipation, also helps prevent digestive disorders like irritable bowel syndrome.
  4. Protein: Kidney beans are among the richest sources of plant-based protein
  5. Fibers present in kidney beans, which moderate blood sugar levels and promote colon health.
  6. Kidney beans are a good source of vitamins and minerals, such as molybdenum, folate, iron, copper, manganese, potassium, Vit. K and phosphorus.
  7. Being low glycemic index, eating kidney beans are may also improve blood sugar control in people who are diabetic.
Good Time to Eat:It is good to eat kidney beans curry for lunch as well as for dinner.

Eat Healthy, Stay Healthy!!!

Sunday, November 11, 2018

Hello Friends,
         Elevate your lunch, dinner or any potluck by serving this best Instant pot mushroom

masala with a peas pulao, naan, or with chapati. It is simple, you don’t need a long time to cook them or don't need fancy varieties of mushrooms. They aren’t wet or raw tasting. Instead, they are bathed in a glaze of their own juices, Indian spices. They turn into juicy mushrooms with a rich earthy appeal. These mushroom masala aren’t just great over rice/pilaf but goes well with naan, roti or with chapati too. They are simple enough for every day but can hold their own as a main course.
         Mushrooms are filled with many nutrients, and these are the powerhouse of protein, and it is an excellent substitute for meat and excellent protein source for vegetarians. Give this recipe a try.


Preparation Time: 10 Minutes, Cooking Time: 3 Minutes.
Each serving of Mushroom Masala Contains 150 Calories.
         

YouTube Video


Ingredients :

  1. Mushrooms 200 g
  2. Green chili paste, 3 strips paste
  3. Ginger-garlic paste 1 tbsp
  4. Onion 2 small, pureed
  5. Tomatoes 2 small, pureed
  6. Cashew nuts paste, 10 - 15 cashews
  7. Garam masala 1 tsp
  8. Red chili powder ½ tbsp
  9. Turmeric powder 1 Tsp
  10. Salt 1 Tsp
  11. Cumin seeds 1 Tsp
  12. Cinnamon ½ inch
  13. Bay leaf 1
  14. Cloves, 2 to 3 pods
  15. Cardamom, 3 pods
  16. Coriander leaves ¼ cup
  17. Olive oil / Veg.oil / Butter 2 tbsp
  18. Water ½ - 1 cup

Recipe :

  1. Wash, clean and chop mushrooms.
  2. Heat veg.oil in the instant pot
    in sauté mode and splutter cumin seeds, cloves, cinnamon, cardamom, and bay leaf.
  3. Now, add onion paste, green, and ginger-garlic paste.
  4. Add tomato puree, mix and saute for a minute and add cashew paste and mix well.
  5. Now add garam masala, turmeric powder, red chili powder, salt, and coriander leaves and mix all well.
  6. Lastly, add mushrooms and ½ cup of water and mix all well.
  7. Cook on - Put the vent in sealing position.
  8. Pressure Cooking Method: High-Pressure manual for 3 minutes and
  9. Pressure Release Method: 5 minutes natural pressure release.
  10. Stir well and if needed, add water to get the desired consistency.
  11. Tadaa, delicious mushroom masala is ready to serve, serve hot with rotis, chapatis, naan or with rice. Enjoy!!!


Dietary Comment :

It makes 4 servings. Based on a 2000 calorie diet. Per serving contains 150 calories, along with carbohydrates - 13.84 g, dietary fibers - 9.1 g, proteins - 5 g.


Health Benefits of Mushrooms :

  1. Mushrooms have anti-inflammatory, antioxidant, antimicrobial, antiviral, antitumor, antiallergic and hypoglycemic properties.
  2. Heart Health: mushrooms protects the heart by maintaining healthy blood pressure and improves circulation.
  3. Brain: Mushrooms improve brain function, mushrooms are a great source of B vitamins, which help support adrenal function.
  4. Weight Loss: substituting mushrooms for meat, will help you to lose weight since mushrooms are a low-calorie, nutrient-dense food.
  5. Eating mushrooms several times per week is linked with healthy body weight, reduced waist circumference, and better overall health.
  6. Vitamin D: Mushrooms are the only fruit or vegetable source of this critical vitamin.
  7. Boost Immunity: Mushrooms may promote immune function by increasing the production of antiviral and other proteins. 

Good Time To Eat :
           It's good to eat Mushroom Masala for lunch, brunch or for dinner.

Eat Healthy, Stay Healthy!!!